Изображения аннотировали, аннотировали, да так и не зааннотировали.
Technical writer’s tongue twister
Image annotation has become a very popular topic due to the development of intelligent image recognition systems and the need to train them. But in this article we will focus on more prosaic tasks – annotating images in documents and reference manuals.
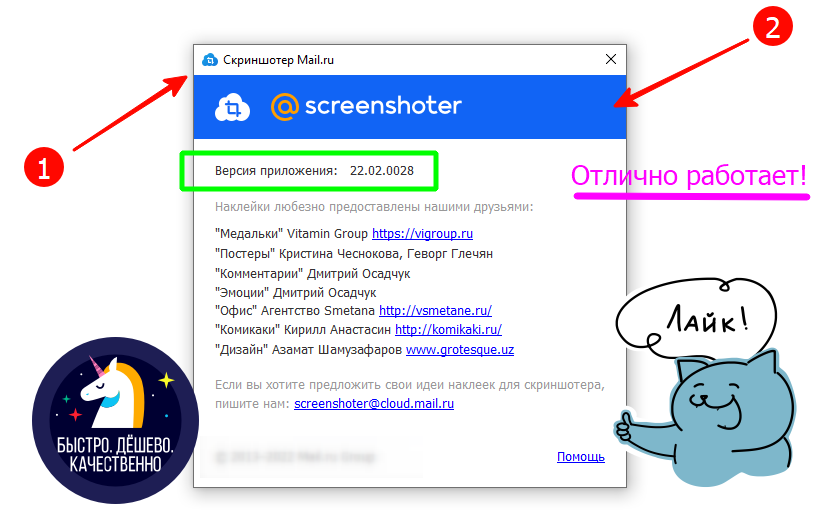
To annotate individual images, I use a screenshot tool from Mail.ru, which can overlay arrows, frames, numbers in circles, and other auxiliary elements necessary for annotating an image on the selected screen fragment. This program is well suited for one-time use, for example, if you need to add an explanatory image to a letter or an illustration for a blog article, that is, in cases that do not involve editing such images.
But when maintaining technical documentation, correction of annotated images is often required. Before I got acquainted with Dr.Explain, this was a problem, because I had to create a new image every time. And if this is an image of a form, then it was necessary to create a white background, placing a Notepad expanded to the full screen in the background. But now I have a handy image annotation tool that can automatically recognize the screen area, as well as application interface elements (including JAVA applications) and HTML forms.
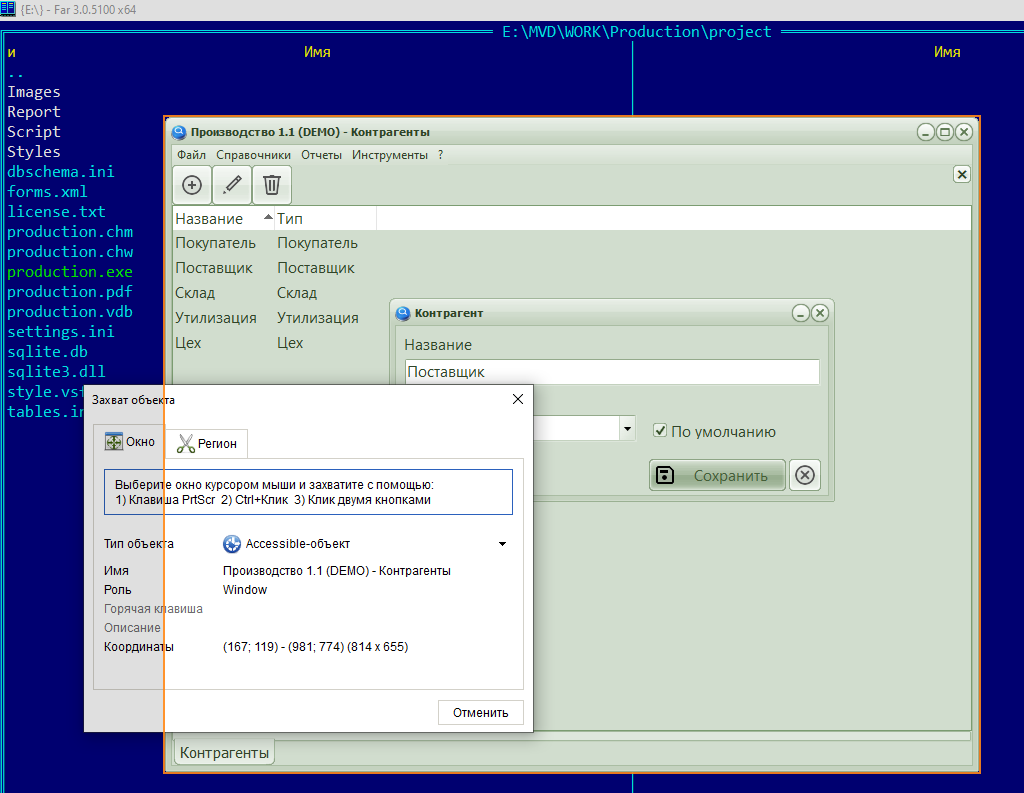
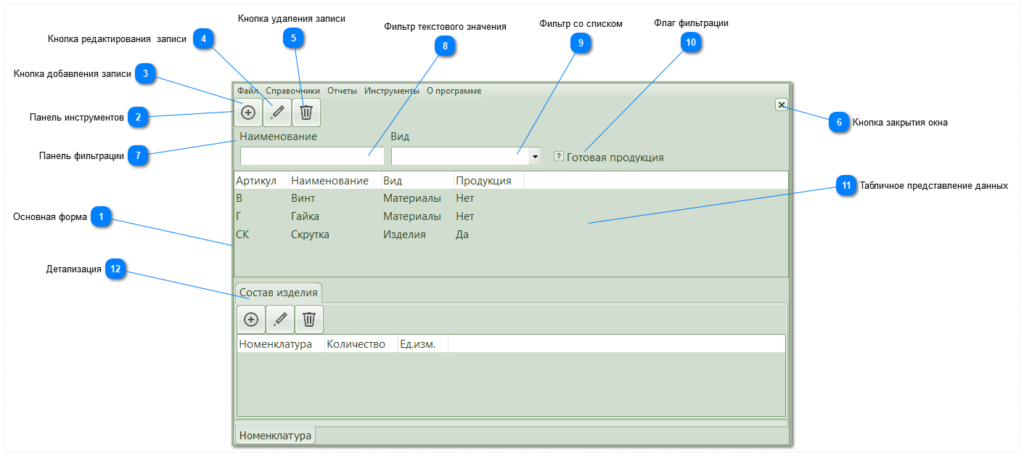
Now I can take an image of the entire screen or its area, an image of the application form or its individual element, save it in the document and start annotating it. Dr.Explain does most of this work for me on its own: places callouts and creates sections with a description for each element. It remains to add explanations and hide those elements that are not currently needed.
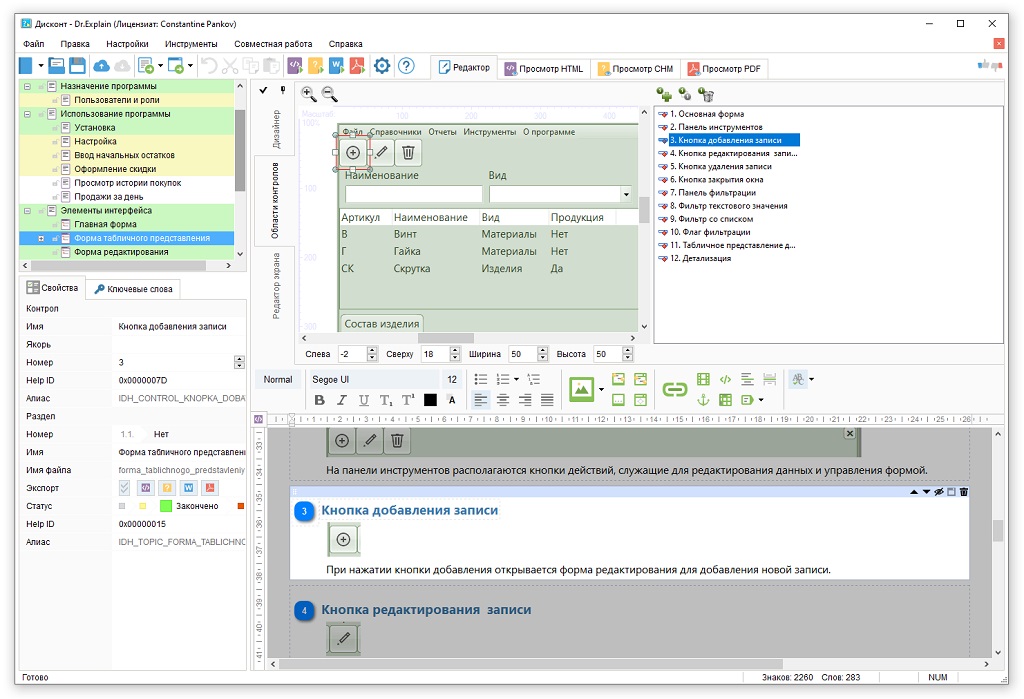
You can also manually add fragments for the annotation, change the order of elements and the location of callouts. You can adjust the scope of the original image. In the end, you can replace the image itself, retaining the annotation elements – this is sometimes necessary if the screenshot captured an error in the program that needs to be fixed, or confidential information got there, or a new version of the program was released and you need to add a description of just one new button.
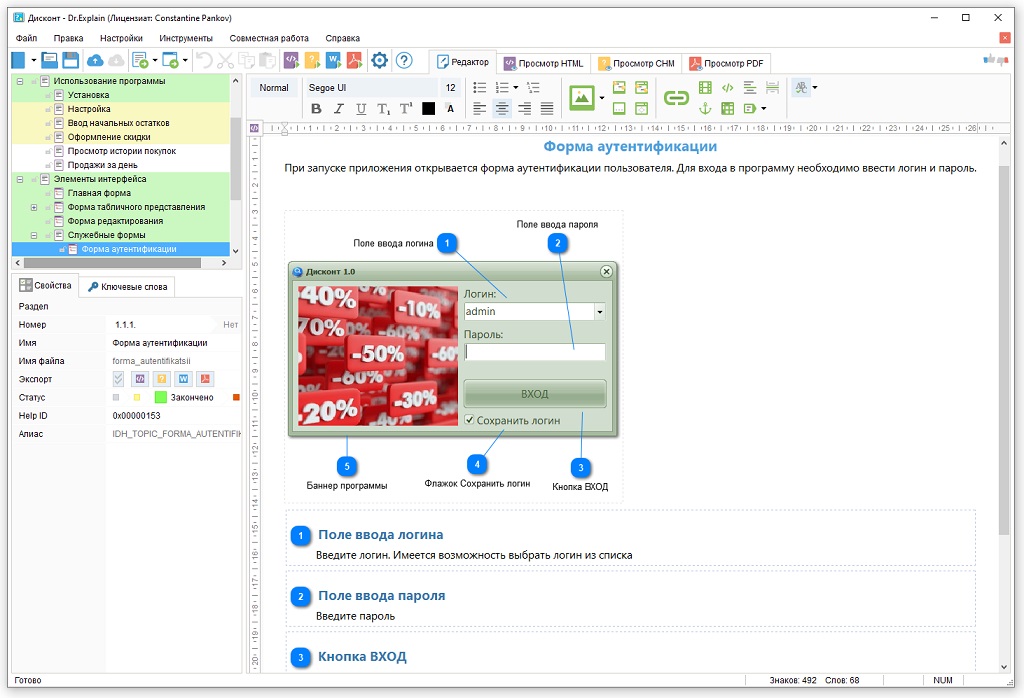
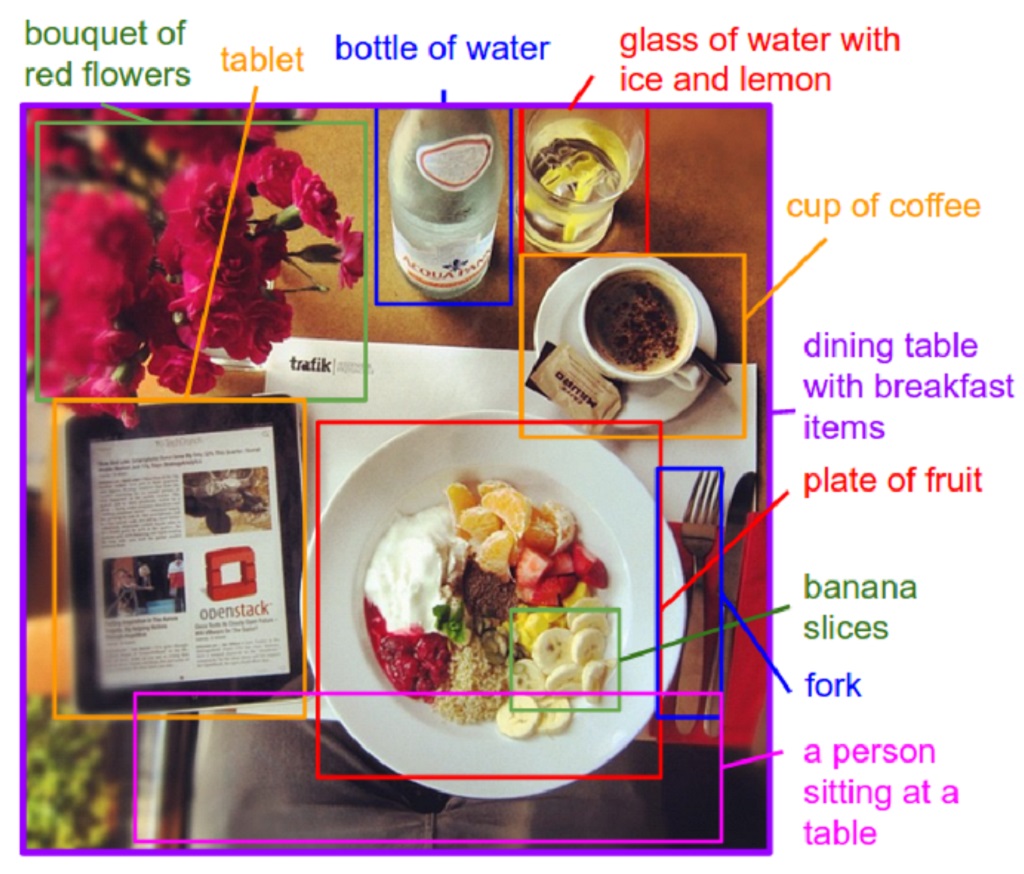
The main feature of the documentation image annotation system is the association of the annotation element (image fragment) with an anchor (hyperlink transition point in the documentation). For this reason, the annotation has a clear structure of elements:
- Graphic image with labels
- List of labels with explanatory text
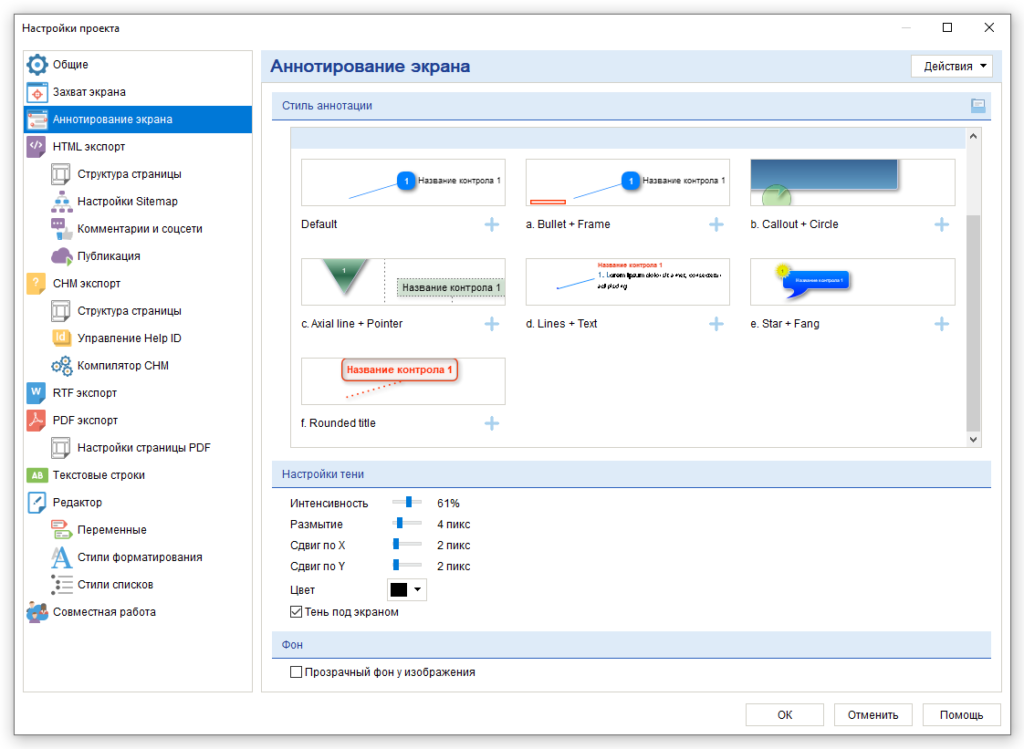
Templates are used to create annotations: settings for graphic elements that are superimposed on the image. Dr.Explain has several ready-made templates, but you can create your own based on them, which will correspond to your ideas or already established corporate documentation standards. The template tool is very flexible. It allows you to easily replace a template in an existing document or use multiple templates at the same time.
So for anyone involved in technical documentation, I recommend dr.Explain – he’s great at annotating images.