
After successfully purchasing the documentation software, Dr.Explain I started creating help files for all my projects, including ClassExplorer – “Developer’s guide”. And then I suddenly thought: did not my new tool replace the program being created for me? Will my new assistant turn into a project killer?
Dr.Explain vs ClassExplorer

Of all the features that the Dr.Explain program has, in this article we will analyze only one – the creation of a knowledge base, because this is how the “Developer’s Reference” or ClassExplorer project is positioned.
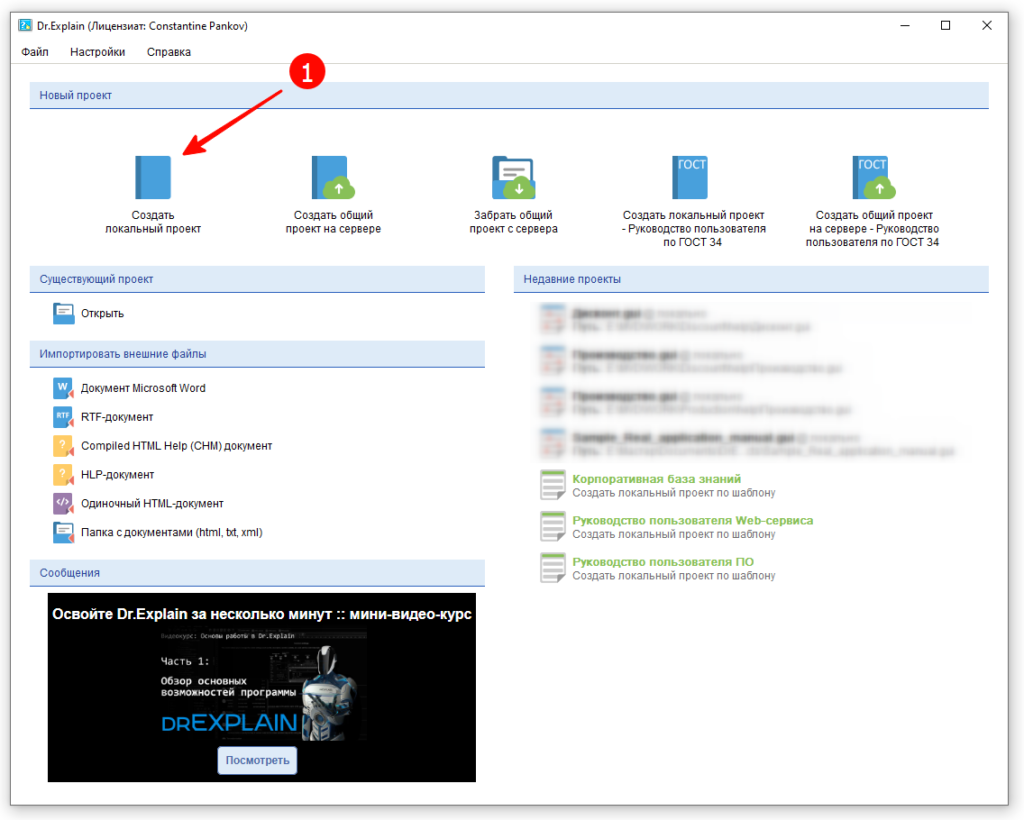
When creating a document in Dr.Explain, you can choose a template, which can save time and ensure the completeness of the description. This is especially true when maintaining documentation in accordance with ГОСТ. A nice bonus of the program is the built-in support for ГОСТ 34, which specifies the basic rules for preparing software documentation. But in our case, this is not necessary, click on the “Create a local project” button (1).
Main form
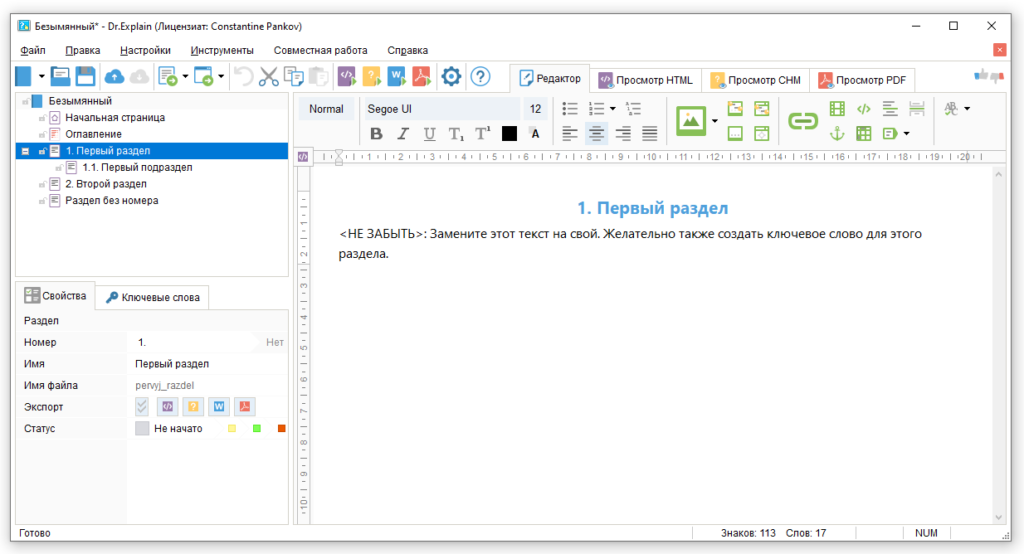
The Dr.Explain workspace is divided into two parts: on the left is a tree of sections (pages), in the middle is a WYSIWYG editor, comparable in functionality to the TdbRichEdit component, which is available to developers using My Visual Database.
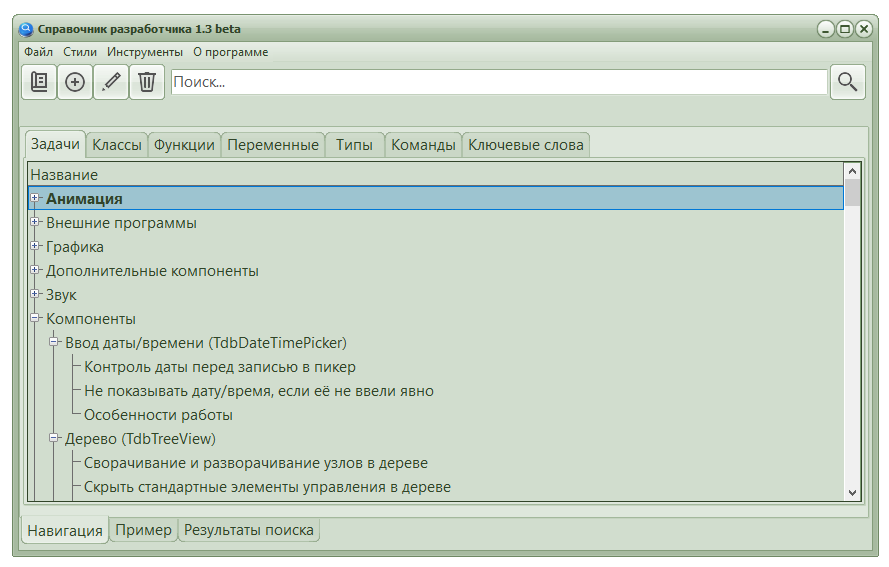
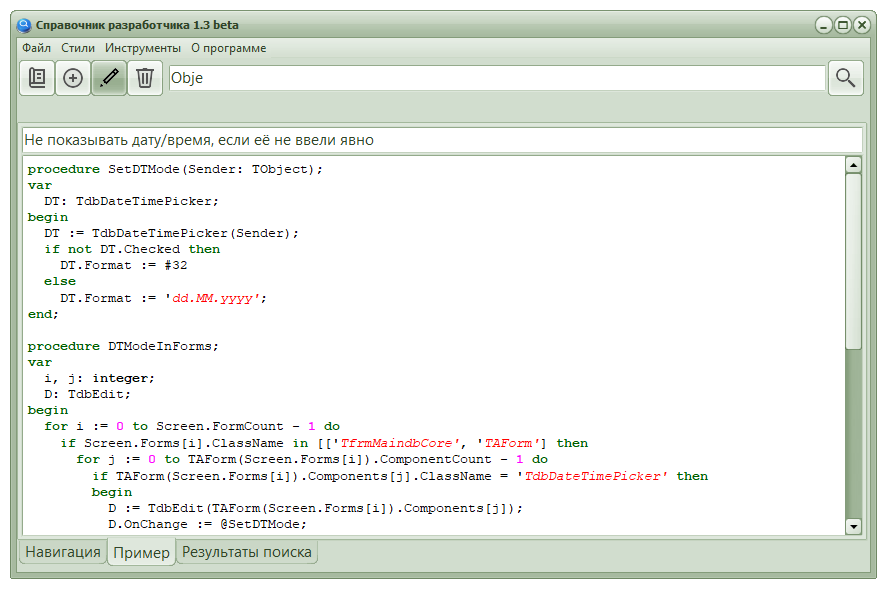
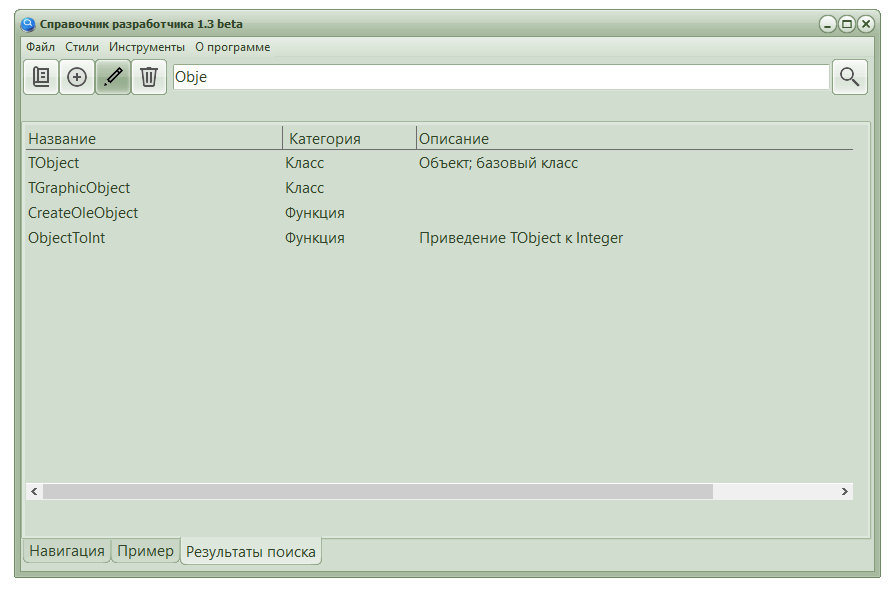
The ClassExplorer workspace is organized differently: a minimalistic toolbar with a search bar, and below there are several tabs that contain tree-like or linear lists by page categories. And to display the page itself, you will need to use the search or click on the button to open the example. And to change the data, you will have to use the buttons on the toolbar and editing forms.
Page Tree
It’s worth taking a closer look at the Dr.Explain tree. At first glance, a tree is like a tree. Only one, but good (c). In addition to user pages, it contains several service pages:
- Document page (root page)
- Start page
- Table of contents
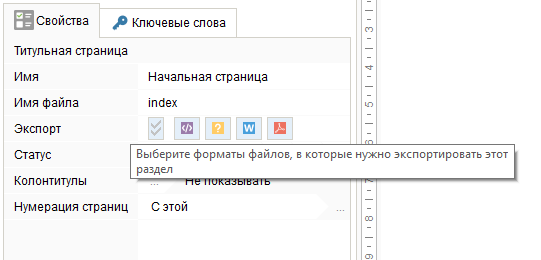
Start page is the element that is usually used when creating a help file – when you open a file without specifying a section, it is the start page that opens. In other output formats, this might be the cover of the document. But for each page, you can optionally configure the need to export to a particular format:
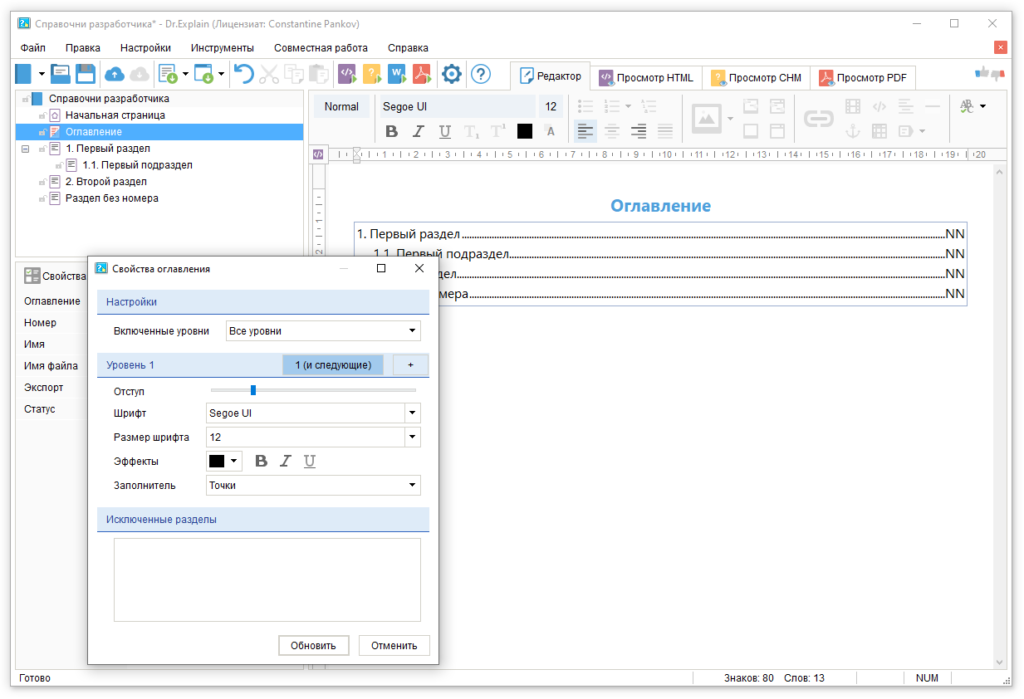
The table of contents is a very useful element when creating printed documentation. Dr.Explain creates the table of contents automatically, without requiring additional steps to update the table of contents after changing the content. At the same time, it is possible to customize both the appearance and the depth of building the table of contents tree. As the author of several guides and tutorials, I appreciated this opportunity.
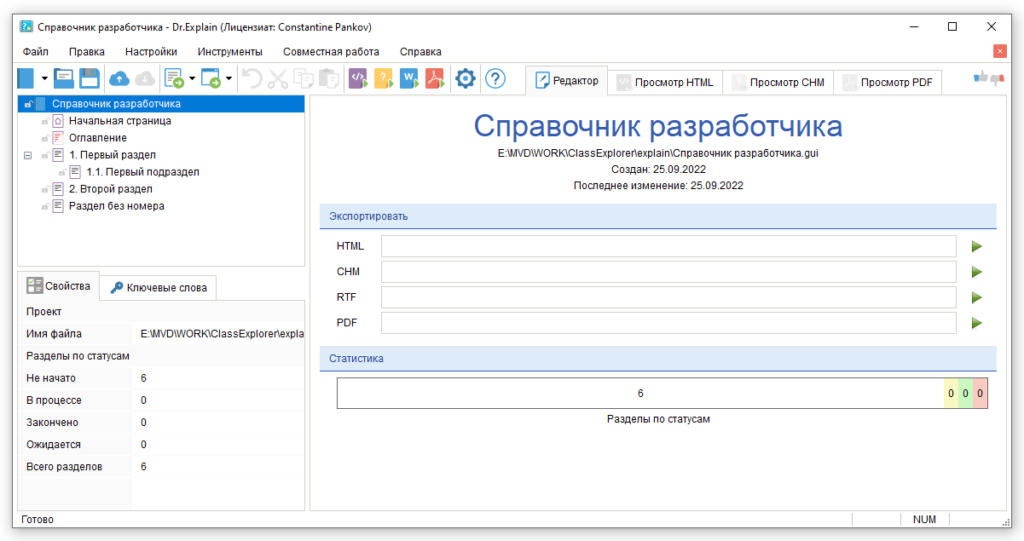
Document page displays statistics and contains tools for exporting data (in our case, to create an information system) into various formats.
Ready statistics is an important element of production planning. And this is a very important point of a professional approach to documentation: when creating a document structure, you simultaneously create (or correct) a work plan, and the readiness is displayed by a special graphical indicator. This is possible due to the fact that each section of the tree has a special readiness status with a color code.
The path to the exported data is also displayed here, which is remembered after the export operation – in my opinion a very fresh interface solution.
Editing the Dr.Explain tree structure is as convenient as possible, as there are several alternative options for this: toolbar buttons, hotkeys, and dragging with the mouse.
The ClassExplorer trees look more modest, without additional graphic elements. Editing the structure is not so easy: you have to use the edit form to move the branch. The only consolation in this situation is that the structure of this guide rarely changes.
To get ClassExplorer statistics, you need to open the “About” form, where you can see the number of items by category.

Editor
For creating pages, Dr.Explain has a rich set of tools: text style control, font characteristics, alignment, and list creation.
The image insertion tool is so cool that it deserves a separate story, but for now I will only mention that it can work wonders: in the process of annotating an image, it recognizes the location of user interface elements and their type, including for applications written in Java.
Internal hyperlinks are what the ClassExplorer lacks (and never will, since the author of My Visual Database put the development of this framework on hold). But Dr.Explorer has them, and thanks to well-thought-out algorithms, if the text and the section name match, linking is possible literally in one click.
At the Dr.Explain page, anything can be inserted: tables, videos, arbitrary HTML code.
There is a unique macro substitution mechanism: you can create text variables in a document, insert them into the text, and then change the value of this variable in one fell swoop. This feature is useful if you have several typical projects with a similar description, which differs only in certain keywords that can be put into variables. I definitely have such projects.
What does ClassExplorer have to offer against it? Only two chips:
Find data
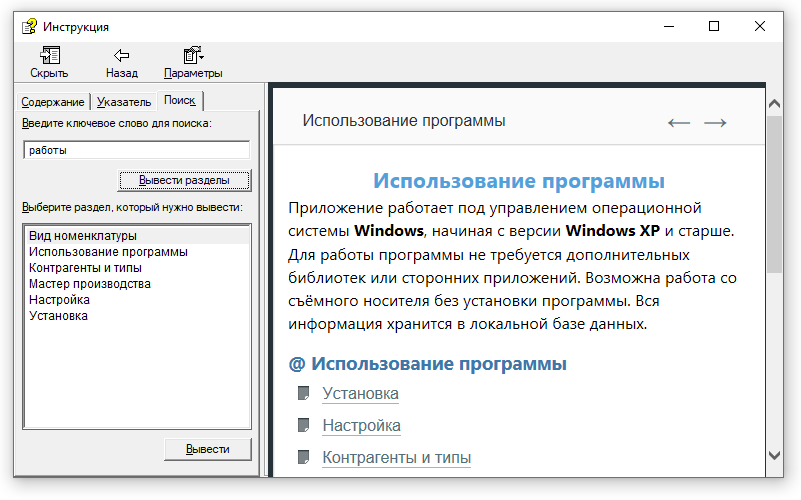
Information systems created by Dr.Explain in HTML or CHM formats have a built-in search system: by keywords and by occurrence of text. The first one is fast, but for its work it requires additional efforts on the part of the author: for each page, you need to create a list of keywords. The second option does not shine with speed, but it differs in completeness of coverage.
Summary
It is quite obvious that Dr.Explain is primarily an editor with which you can create an information system: in the form of a set of HTML files or a CHM file. And ClassExplorer is an information system with the ability to edit data. Although Dr.Explain has richer editing facilities, ClassExplorer implements specialized algorithms that are more useful when documenting programming examples.
By the authority vested in me in my blog, I declare a truce: both tools remain on my shelf as partners in the common cause of software development and education.