
A typical task of data representation is to create Master-Detail relationships, that is, when one object is a detail of another. In other words, we can say that one object consists of several others. In this case, the classes of objects differ. Implementing this in Data Keeper was not difficult, but some changes and improvements still had to be made.
Data structure
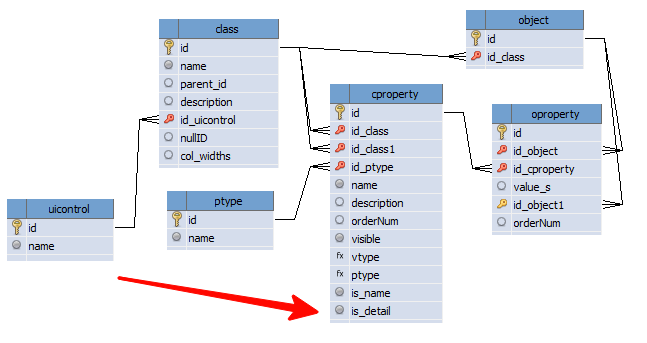
Detailing is built based on a property that refers to the master object. But this very detail is not always required. Therefore, it is necessary to add a logical field is_detail to the cproperty table, which will be responsible for visualizing the detail – turning a one-to-many relationship into a pair of tables on the form.
For a new field, add an element on the efmCProperty editing form.
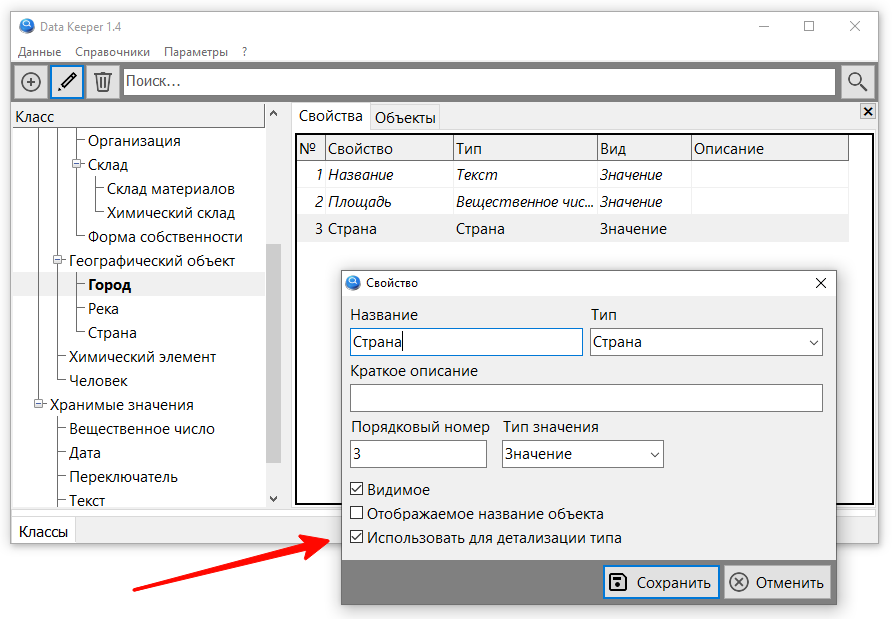
As you can see from the example, the “Country” property of the “City” class is used to refine the type. In this case, the type is Country. It sounds a little strange, but I haven’t come up with a simpler name yet. But, I hope, it is quite obvious that after setting this flag, when viewing the list of countries, a tab with details by city should appear.
Forms
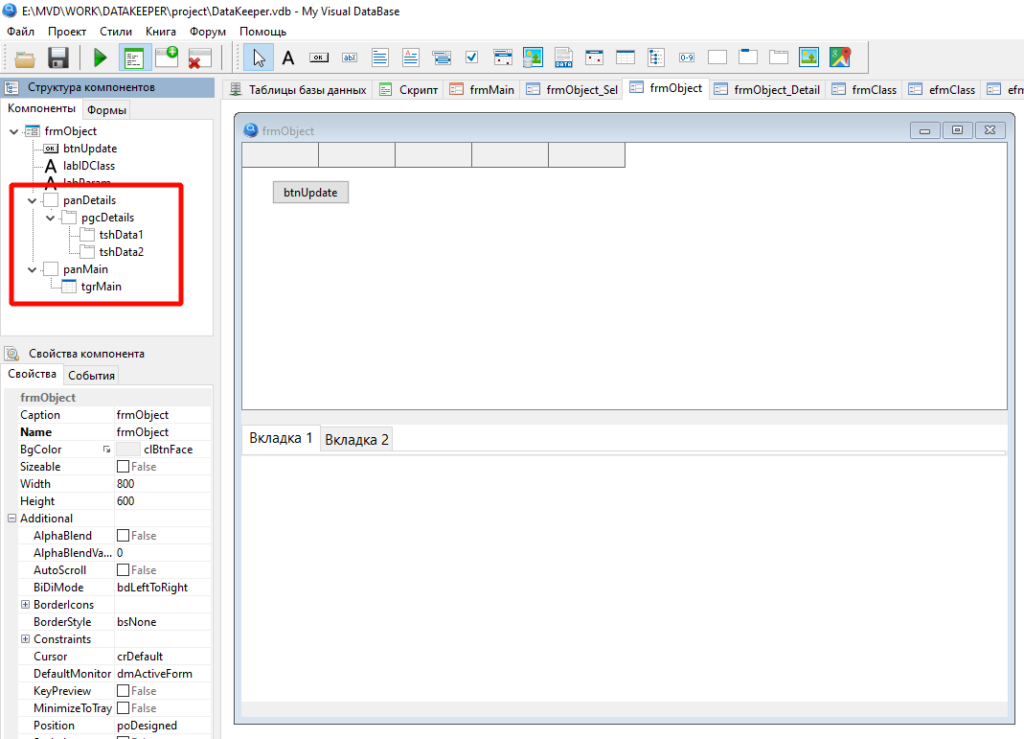
Changes have been made to the object display form: the table for displaying tgrMain data has been moved to a new panMain panel, which is located at the top of the form. At the bottom of the form, a second panel has been added – panDetails, which serves to display the pgcDetails detail button switch, created from the TdbPageControl component. For everything to work, using scripts, the alignment is set (the Align property) and a splitter is added (the TSplitter component). Note that pgcDetails has a small height, since the rest of panDetails is used to place the detail form – frmObject_Detail – on it.
Brief information on the service functions and procedures that were used for this:
- Splitter_Create() – creating a splitter
- Form_ShowOnWinControl() – placing a form on another form component
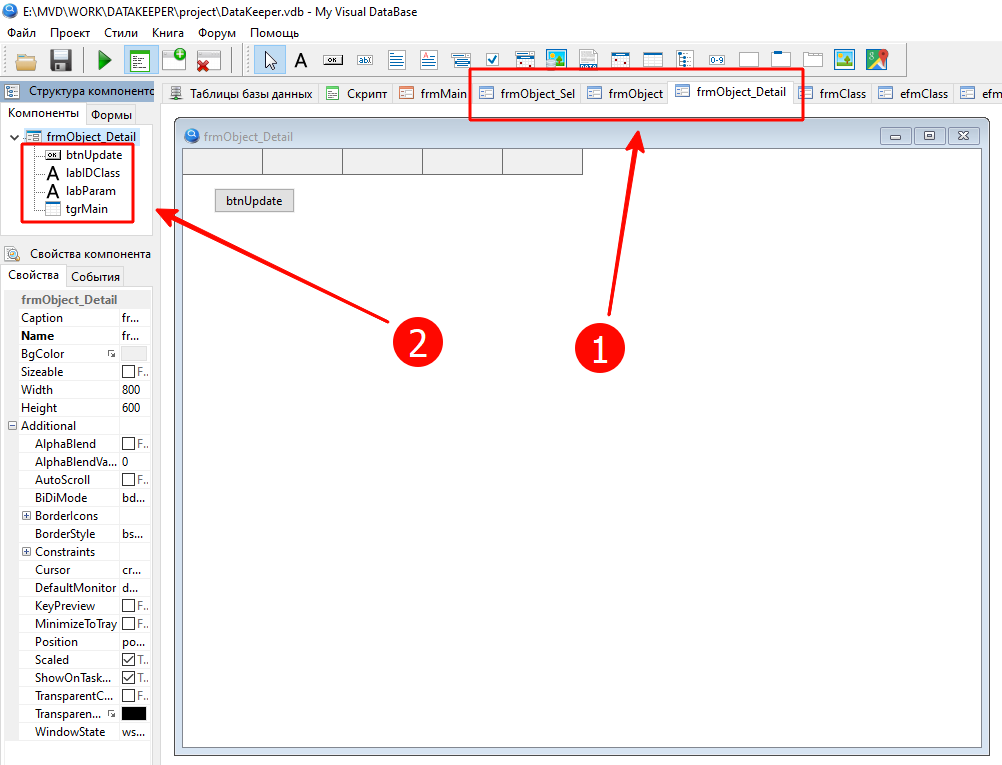
Please note that all forms designed to display objects have the same name, differing only in the suffix, which is separated by an underscore. They also have a set of identical components, which makes it possible to use the same procedures for data visualization and other actions with these forms.
The btnUpdate button click handler procedure is responsible for displaying the details. The list of classes that need to be displayed in the detail tabs is obtained by the query
SELECT
class.id, class.name
FROM cproperty
LEFT JOIN class ON class.id = cproperty.id_class
WHERE
cproperty.is_detail = 1
AND cproperty.id_class1 = <ID_Мастер-объекта>Code language: SQL (Structured Query Language) (sql)The full text of the frmObject_btnUpdate_OnClick procedure is given below.
procedure frmObject_btnUpdate_OnClick (Sender: TObject; var Cancel: boolean);
// update display
var
  tmpIDClass: integer;
  tmpButton: TdbButton;
  tmpDataSet: TDataSet;
  tmpSQL: string;
  i: integer;
  tmpTabSheet: TdbTabSheet;
  Splitter:TSplitter;
begin
  frmObject.labIDClass.Caption := 'Change'; // block the work of frmObject_tgrMain_OnColumnResize
  // a query is built to select data - all objects of the specified class
  // get the class ID from the class tree
  tmpIDClass := Form_GetDataViewer( GetFormByName('dtfClass_Tree') ).dbItemId;
  frmObject.labIDClass.Tag := tmpIDClass; // запоминаем класс
  tmpButton := TdbButton(Sender);
  btnPrepareOject( tmpButton, tmpIDClass);
  // remove detail
  for i:= frmObject.pgcDetails.PageCount - 1 downto 0 do
  begin
    frmObject.pgcDetails.Pages[i].Free;
  end;
  FindC(frmObject,frmObject.panDetails.TagString,Splitter);
  Splitter.Visible := False;
  frmObject.panDetails.Visible := False;
  // determine if there is detailing and create button tabs
  tmpSQL := 'SELECT class.id, class.name FROM cproperty LEFT JOIN class ON class.id = cproperty.id_class WHERE cproperty.is_detail = 1 AND cproperty.id_class1 = '+IntToStr( tmpIDClass );
  SQLQuery(tmpSQL,tmpDataSet);
  while not tmpDataSet.EOF do
  begin
    tmpTabSheet := TdbTabSheet.Create( frmObject );
    with tmpTabSheet do
    begin
      PageControl := frmObject.pgcDetails;
//      Name := '';
      Caption := tmpDataSet.FieldByName('name').asString;
      Tag := tmpDataSet.FieldByName('id').asInteger;
//      TagString := '';
    end;
    tmpDataSet.Next;
  end;
  if frmObject.pgcDetails.PageCount > 0 then
  begin
    frmObject.panDetails.Visible := True;
    Splitter.Visible := True;
    frmObject_Detail.btnUpdate.Click;
  end;
end;Code language: PHP (php)
To edit the detailed part, the efmObject form is also used, and the mechanism for calling the editing form itself remains the same, since the ability to call the editing form by the name of the table view form was implemented through a call to the Grid_GetTableName() function.
function Grid_GetTableName(AGrid: TdbStringGridEx): string;
// returns table name
var
  tmpForm: TAForm;
begin
  // We use the convention for naming the form:
  // <frm><table name>[_<suffix>]
  // that is, there can be several forms with a table view for one table,
  // they must be distinguished by a suffix
  CForm(AGrid, tmpForm);
  Result := DeleteSuffix(DeleteClassName(tmpForm.name));
end;
Code language: PHP (php)
An important detail is the function of automatically filling the detail connection field with the master when adding a new record. To do this, just a few lines (19-29) were added to the efmObject_OnShow() procedure:
    if tmpControlID = 2 then // combpBox
    begin
      //
      FindC(tmpForm,'cmbData_'+intToStr(tmpCount),tmpComboBox,False);
      if tmpComboBox = nil then
        tmpComboBox := TdbComboBox.Create( tmpForm );
      with tmpComboBox do
      begin
        visible := True;
        name := 'cmbData_'+intToStr(tmpCount);
        parent := tmpParent;
        Font.Size := 11;
        top := tmpCount * 50 + tmpLabel.Height;
        left := 8;
        width := 300;
        tagString := VarToStr( SQLExecute('SELECT id_object1 FROM oproperty WHERE id_object = '+IntToStr( efmObject.btnSave.dbGeneralTableId  )+' AND id_cproperty = '+tmpDataSet.FieldByName('id').asString ) );
        dbSQL := 'SELECT object.id, oproperty.value_s FROM object LEFT JOIN oproperty ON oproperty.id_object = object.id WHERE oproperty.id_cproperty = ( SELECT id FROM cproperty WHERE cproperty.is_name = 1 ) AND object.id_class = '+tmpDataSet.FieldByName('ClassID').asString+' ORDER BY 2';
        dbUpdate;
        enabled := True;
        // auto-completion of communication with the master
        // if the table being edited is a detail table and the field is a master connection field, then
        if (ActiveGrid = frmObject_Detail.tgrMain) and (tmpDataSet.FieldByName('is_detail').asInteger = 1) then
        begin
          enabled := False; // make the field unavailable for manual changes
          if (Action = 'NewRecord') then
          begin // and for a new record we add ID from the main table
            tagString := IntToStr( frmObject.tgrMain.dbItemID );
          end;
        end;
        if tagString <> '' then // if there is a reference value, then synchronize the dropdown list
          dbItemID := StrToInt(tagString);
        onChange := 'efmObject_cmbEdit_OnChange';
        Font.Style :=0;
      end;
    end;

Code language: PHP (php)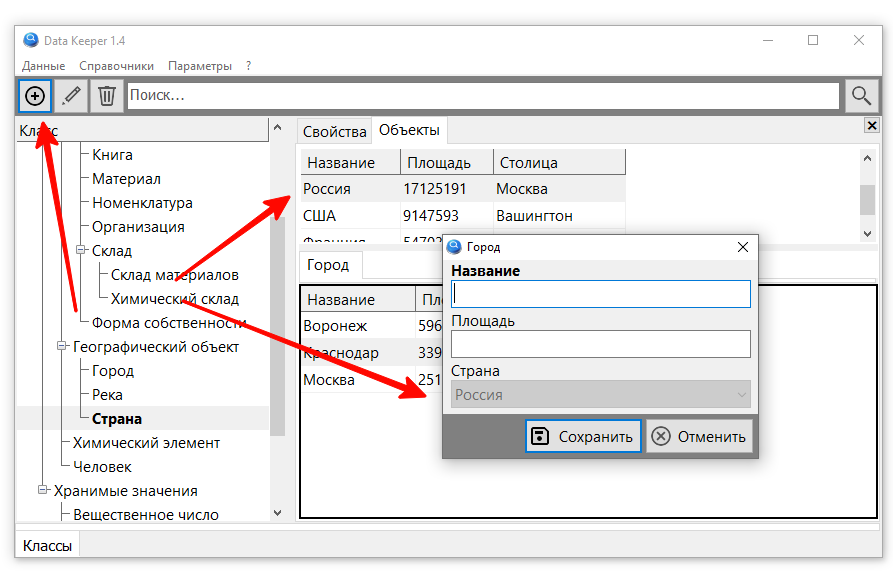
You will also need a script to delete details when deleting a master, since cascade deletion, which is usually used in such cases, will not work – the objects are stored in one table and linked indirectly, through the properties table. But I will do this in the next version, but for now I will have to manually delete all detail objects, and only then the master object.
Results
You can now create a drill-down view of the data from any reference property.

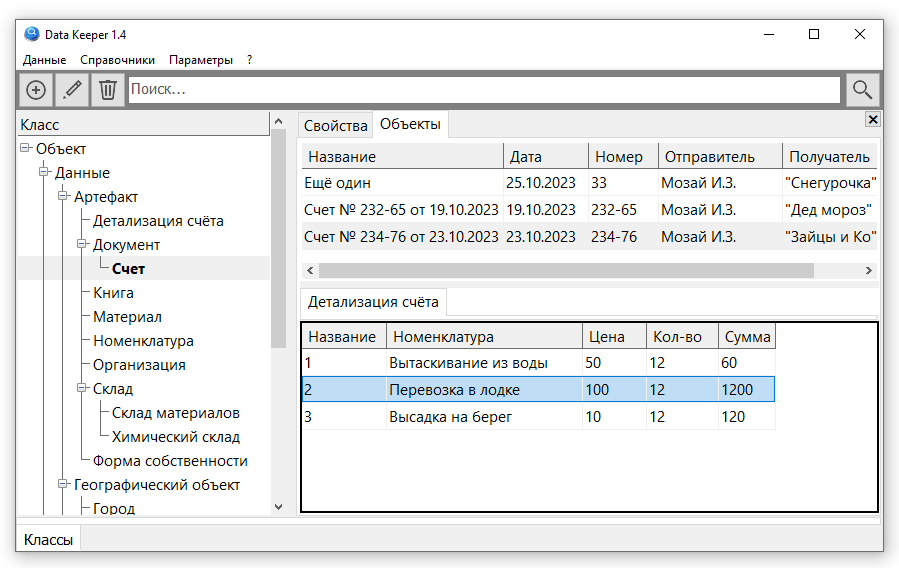
It turned out well, it looks like a real invoice, but now the shortcomings have become more visible.
Each object has a “Name” property. It is not relevant for the account; the date and number are enough to identify it. On the other hand, if you need the account as a property in another object, then you either need to add to the settings system to display the name of the object (to display two fields at once: date and number), or you need some kind of mechanism for automatically filling in the name based on data from other fields on the editing form. This also applies to the “Amount” field, the value of which is the product of the values of the “Price” and “Quantity” fields. On the other hand, such fields are usually calculated – they are not stored in the database, but are displayed in a table view, and in My Visual Database they can also be displayed on the editing form.
What else needs to be done:
- Removing detail when deleting a master record
- Right alignment for numeric data types
- Interval class tree
- Searching for objects by a given property value (several properties)
- Setting the visibility of columns in a table view without using inheritance
- Macros for automatically filling fields on the client
- Calculated fields for table view
- Creation of arbitrary views (using an analogue of SQL for OOP).
- Filtering (automatic construction of a filter panel for objects of a given class based on a list of properties)
- Flag for mandatory completion of an object property (analogous to a required field)
- Flag of the uniqueness of a property of a class object (analogous to the uniqueness of a field value)
- Global uniqueness flag of an object property (or property with GUID generation)
- Extension of basic data types (time, yes/no, images/files, etc.)
- Adding control for data types (analogous to domains) – range of values for numbers and dates, text length for strings, etc.
- Manually adjusting the position and size of components on the class editing form.
- Adding new reference values directly from the object editing form.